A lot of games start the same way: a short burst of a logo, a sound or jingle to grab your attention, and then the game. The Neversoft eyeball logo before Tony Hawk's Pro Skater, the iconic Valve intro with the bald guy that always jump scared me, the rising sting and gentle jingle that played every time I would boot up my PlayStation, or the memorable animation that played when booting up my brother's GameCube.
It's a few seconds that tells you who made the thing you're about to play. Hexbit Studios didn't have one, so I used Remotion to help me make one.
This post covers the whole trip: building the animation in code with Remotion, the rounds of tweaks it took to make it feel right, picking the sound, and wiring the finished video into a Godot 4.7 project as a skippable splash screen.
What the intro does
The final cut is about 4.4 seconds at 1080p and 60fps. Here's the sequence:
Why Remotion
I wanted the logo animated, not a video of an image sliding around. The mark is three concentric hexagons with a cube in the middle, so every piece has to move on its own. That rules out a lot of quick tools.
The usual answer is After Effects. I went with Remotion instead, for a few reasons:
- It's code. Every beat lives in a file, so retiming the whole thing is changing a number. It's also diffable and lives in git next to everything else.
- It's React. If you've built a web page, you already know how to lay things out. SVG, CSS filters, gradients and images all just work.
- It renders real video files. You get an MP4 (or WebM, ProRes, GIF, PNG sequence) out the other end, which is exactly what a game engine wants...well usually. Godot wants a specific format, but more on that below.
What Remotion actually is
Remotion is a framework for making videos with React. The core idea is simple: a video is a function of the frame number. Remotion gives your components the current frame, you return what that frame should look like, and Remotion renders every frame in a headless Chrome and stitches them together with FFmpeg.
There's no timeline of keyframes. If you want something to fade in over half a second, you say so in code:
import { interpolate, useCurrentFrame } from 'remotion';

export const FadeIn = () => {
  const frame = useCurrentFrame();
  // Frames 0-30 map to opacity 0-1, then hold at 1.
  const opacity = interpolate(frame, [0, 30], [0, 1], {
    extrapolateRight: 'clamp',
  });
  return <div style={{ opacity }}>Hello</div>;
};
The handful of building blocks I leaned on:
useCurrentFrame(): The frame being rendered. Everything is derived from this.interpolate(): Map a frame range onto any value range, with optional easing.spring(): Physics-based motion for anything that should settle naturally.Easing: Ease-in, ease-out and friends forinterpolate.<Sequence>: Shift a child in time, so it "starts" at a given frame.<Composition>: Registers a video: its size, fps, length and root component.random(seed): Deterministic randomness, so shake and grain look the same on every render.
That last one matters more than it sounds. Remotion renders frames in parallel and out of order, so Math.random() would give you a different shake every render. Seeded randomness keeps it stable.
Setting up a project
The quickest way to start is the official scaffolder:
npx create-video@latest
You then register a composition in the root file:
import { Composition } from 'remotion';
import { HexbitIntro } from './HexbitIntro';

export const RemotionRoot = () => (
  <Composition
    id="HexbitIntro"
    component={HexbitIntro}
    durationInFrames={262}
    fps={60}
    width={1920}
    height={1080}
  />
);
The two commands you'll use all day:
npx remotion studio                                    # live preview with a scrubbable timeline
npx remotion render HexbitIntro out/hexbit-intro.mp4   # render the final video
The Studio is where the work happens. You get a preview with a timeline you can scrub frame by frame, and it hot-reloads when you save. Because the timeline knows about your <Sequence>s, each one shows up as a named track.
Licensing: Remotion is free for individuals, non-profits and for-profit companies with up to 3 employees. Bigger companies need a company license. Check the license for your situation. If you're a solo indie dev like me, this is a great option.
Building it
Step 1: Turn the logo into shapes
The first job was getting the logo out of a PNG and into geometry I could move. The mark turned out to be very regular: three concentric pointy-top hexagons sharing one centre, with radii of 332, 258 and 184 pixels on a 1200px canvas. A tiny helper gives any vertex of any hexagon:
const hexPt = (r: number, k: number) => {
  const a = ((-90 + 60 * k) * Math.PI) / 180;
  return [CX + r * Math.cos(a), CY + r * Math.sin(a)];
};
From that, each of the six outer frame sides is a quad between the outer and middle hexagons, the socket walls come off the inner hexagon, and the cube is three rhombuses. Everything is an SVG <polygon>, so each piece can have its own transform, opacity and timing.
The wordmark is a different kind of shape, so I didn't redraw it. I cropped each letter out of the text logo as its own image and animated those.
Step 2: Put every beat in one file
Before animating anything, I wrote the storyboard down as frame numbers:
export const T = {
  powerOn: 0, // CRT-style line flicks on
  frameIn: 12, // hex frame sides start flying in
  frameStagger: 4,
  frameDuration: 36,
  socketIn: 44, // socket walls fade up
  cubeDrop: 58, // cube starts falling
  cubeImpact: 76, // cube lands
  markMove: 104, // mark shrinks and moves up
  boxDraw: 116, // wordmark border draws on
  hexbitIn: 126, // "hexbit" letters rise
  letterStagger: 4,
  studiosIn: 146, // "STUDIOS" tracks out
  glint: 178, // light sweep across the mark
  fadeOut: 238,
  end: 262,
};
This was the best decision of the project. Every component and every sound reads its timing from here. Moving the impact later moves the cube, the shake, the shockwave, the glitch and the impact sound together.
Step 3: Make it move
A few pieces worth showing:
The cube drop uses an ease-in curve, so it accelerates like it's falling:
const t = interpolate(frame, [T.cubeDrop, T.cubeImpact], [0, 1], {
  extrapolateLeft: 'clamp',
  extrapolateRight: 'clamp',
  easing: Easing.in(Easing.quad),
});
const y = (t - 1) * 1100; // starts 1100px above its resting spot
The squash on impact is a bouncy spring. The cube scales wider and shorter around its bottom point, then springs back:
const settle = spring({
  frame: frame - T.cubeImpact,
  fps,
  config: { damping: 9, stiffness: 260, mass: 0.6 },
});
const squash = 1 - settle;
const sx = 1 + 0.08 * squash;
const sy = 1 - 0.14 * squash;
The wordmark border "draws on" with the classic SVG trick: set pathLength={1}, use a dash as long as the path, and animate the dash offset from 1 to 0.
Step 4: Iterate until it feels right
The first render was close, but "close" in motion design is a long way from done. The tweaks that made the biggest difference:
- No glow until the impact. The mark has a pink glow, and it was lighting up the empty socket before the cube arrived which gave away the punchline. I put an opaque backing shape behind the socket that hides the glow, then fades away the moment the cube lands. Now the light switches on when the cube hits.
- No overshoot on the frame pieces. I first used springs for the six sides sliding in. Springs overshoot, so each piece went slightly past its spot and bounced back. It looked wobbly next to the sharp geometry. Swapping to a plain ease-out (
Easing.out(Easing.cubic)) made them glide in and stop dead, which looks far cleaner. - Slowing the assembly down a smidge. The sides were arriving so fast they read as one blob. A few extra frames per side let each one register.
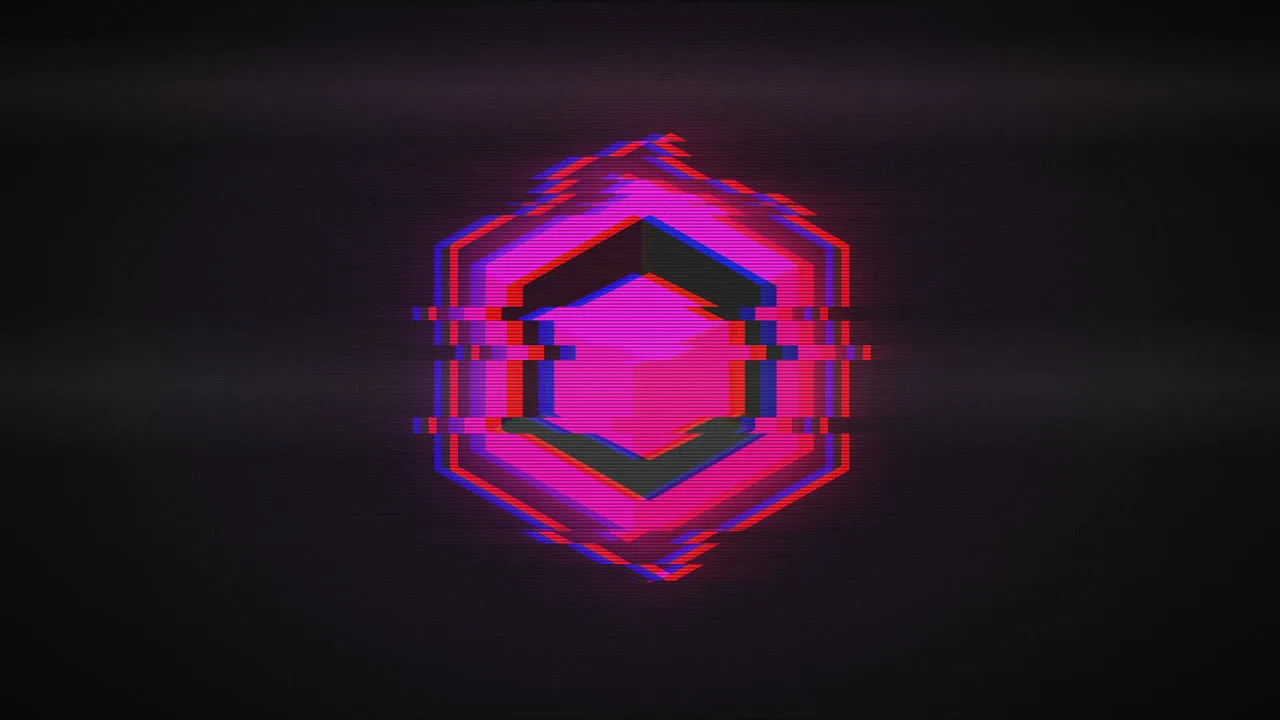
Step 5: The CRT glitch
This is my favorite part (I love glitchy effects so much). When the cube slams down, the whole screen tears apart for about 26 frames, then settles.
It's all done with an SVG filter wrapped around the scene:
- Horizontal tearing.
feTurbulencewith a base frequency of0 0.018makes noise that only changes vertically, so it comes out as horizontal bands.feComponentTransferwith adiscretetable snaps those bands into hard steps.feDisplacementMapthen shoves each band of the picture sideways by a different amount. - RGB split. Three
feColorMatrixpasses pull out the red, green and blue channels. Red shifts right, blue shifts left, andfeBlendinscreenmode puts them back together with color fringes. - On-top layers. Scanlines, a bright rolling band, film grain and a vignette are plain CSS layers over the top.
<filter id="crt">
  <feTurbulence
    type="fractalNoise"
    baseFrequency="0 0.018"
    seed={frame}
    result="noise"
  />
  <feComponentTransfer in="noise" result="bands">
    <feFuncR
      type="discrete"
      tableValues="0.3 0.6 0.5 0.15 0.5 0.5 0.85 0.5 0.4 0.7"
    />
    <feFuncG type="discrete" tableValues="0.5" />
  </feComponentTransfer>
  <feDisplacementMap
    in="SourceGraphic"
    in2="bands"
    scale={tear}
    xChannelSelector="R"
    yChannelSelector="G"
  />
  {/* ...then split and recombine the RGB channels */}
</filter>
The strength of all of this comes from one number, hit, that spikes to 1 at the impact and decays. It has a small second hiccup around frame 11 and a bit of per-frame flicker. Feeding seed={frame} to the turbulence gives a fresh tear pattern every frame.
The same filter at much lower strength gives the steady CRT look from the start. Once the glitch has played out, that strength eases down to zero over about a third of a second, and the picture clears up to crisp.
Step 6: Sound
I'd underestimated how much of an intro is sound. The first pass used placeholder sounds I synthesized in a small Node script, just to get timing right. Then I bought the Retro and 8-Bit Arcade SFX Library on itch.io and swapped them all out.
Sound cues in Remotion are just audio clips inside <Sequence>s, timed off the same T object:
import { Audio } from '@remotion/media';
import { Sequence, staticFile } from 'remotion';

const CUES = [
  { name: 'Power on', from: T.powerOn, file: 'crt-power-off.wav', volume: 0.6 },
  {
    name: 'Cube fall',
    from: T.cubeImpact - 24,
    file: 'fall-long.wav',
    volume: 0.5,
  },
  { name: 'Impact', from: T.cubeImpact, file: 'impact.wav', volume: 1 },
  {
    name: 'Letters',
    from: T.hexbitIn + 11,
    file: 'score-tick-6.wav',
    volume: 0.8,
  },
  { name: 'Glint', from: T.glint + 4, file: '1-up-jingle.wav', volume: 0.6 },
];

export const Sfx = () => (
  <>
    {CUES.map((c) => (
      <Sequence key={c.name} name={c.name} from={c.from} layout="none">
        <Audio src={staticFile(`sfx/${c.file}`)} volume={c.volume} />
      </Sequence>
    ))}
  </>
);
What I learned along the way:
- Less is more. I started with a click for each frame side locking in and a whistle on the cube drop. Cutting both made the impact hit much harder, because it now comes out of near silence.
- Line sounds up with the picture. The
fall-longsound ends in a low rumble. I trimmed its start so the whistle only lasts as long as the visible drop and the rumble lands exactly on the impact frame. - Let the big moment ring out. The impact is a
boss-stomprun through a reverb, so it trails off under the letters instead of stopping dead. I made the reverb with FFmpeg'safirfilter and a fake "room": a couple of seconds of filtered noise that fades out. Then I shortened the tail when it ran too long. - Not every sound fits its name. The opening uses
crt-power-off, notcrt-power-on. It just sounded better with the picture. - The letter ticks are one file.
score-tickhas a run of rising ticks about 70ms apart, which is very close to the letters' 4-frame stagger at 60fps. I trimmed it to the first six, one per letter in "hexbit".
All the trimming, pitching and reverb lives in a small shell script that copies sounds out of the library folder with FFmpeg. If I want to swap a sound, I edit the script and the cue list and re-render.
Final Render with Sound
Bringing it into Godot 4.7
With a finished MP4, the last step is getting it to play when the game boots.
Step 1: Convert to Ogg Theora
Godot only plays Ogg Theora video (.ogv) out of the box. H.264 and H.265 can't ship in the engine because of patents. So the MP4 needs converting. The Godot docs recommend:
ffmpeg -i hexbit-intro.mp4 -q:v 6 -q:a 6 -g:v 64 hexbit-intro.ogv
-q:v 6and-q:a 6are the docs' suggested balance of quality and size, on 1–10 scales.-g:v 64sets a longer keyframe interval than the default of 12, which compresses much better.
Two gotchas:
- Your FFmpeg needs to be built with
libtheoraandlibvorbis. The default Homebrew build on macOS doesn't include them, so check withffmpeg -encoders | grep -E 'theora|vorbis'. - Theora decodes on the CPU. The docs suggest 1080p at 30fps or lower for desktop and 720p or lower for mobile and web. My intro is 1080p60, which is fine on desktop. For mobile or web, add
-vf "scale=-1:720" -r 30.
Tip: You can use VLC to convert MP4 files to
.ogvformat as well.
Copy the .ogv file into your project, e.g. res://intro/hexbit-intro.ogv. Godot imports it as a VideoStreamTheora.
Step 2: Make the boot splash blend in
Before your first scene loads, Godot shows its own boot splash. By default that's a grey screen with the Godot logo, which would flash up before your intro and spoil it.
In Project → Project Settings → Application → Boot Splash:
- Bg Color: pure black (
#000000), matching the first frame of the intro. - Show Image: off.
Now the engine boots to black, and the intro starts from black, so there's no visible seam.
Tip: If you'd rather use the boot splash for something, you can set Image to a PNG of your own and pick a Stretch Mode. Just make its background match the first frame of your video.
Step 3: Build a splash scene
Make a new scene, res://intro/splash.tscn:
Splash (Control, anchors: Full Rect)
├── Background (ColorRect, Full Rect, black)
└── AspectRatioContainer (Full Rect, Ratio 1.778)
    └── Video (VideoStreamPlayer, Expand on, Stream: hexbit-intro.ogv)
- The black ColorRect fills the letterbox bars if the window isn't 16:9.
- By default a VideoStreamPlayer sizes itself to the video's pixel size. Turning on Expand and putting it in an AspectRatioContainer set to the video's ratio (16:9 ≈ 1.778) scales it to fit any window without stretching.
- Leave Autoplay off. The script starts playback.
- Right-click the
Videonode and choose Access as Unique Name so the script can find it as%Video.
Attach this script to the root Splash node:
extends Control

@export_file("*.tscn") var next_scene: String = "res://scenes/main_menu.tscn"

@onready var video: VideoStreamPlayer = %Video

var _leaving := false


func _ready() -> void:
	# Start loading the menu in the background while the intro plays.
	ResourceLoader.load_threaded_request(next_scene)
	video.finished.connect(_go_next)
	video.play()


func _unhandled_input(event: InputEvent) -> void:
	# Any key, click or controller button skips the intro.
	var is_skip := event is InputEventKey or event is InputEventMouseButton or event is InputEventJoypadButton
	if is_skip and event.is_pressed() and not event.is_echo():
		_go_next()


func _go_next() -> void:
	if _leaving:
		return
	_leaving = true
	var scene := ResourceLoader.load_threaded_get(next_scene) as PackedScene
	get_tree().change_scene_to_packed(scene)
What it does:
- Loads the next scene while the intro plays.
load_threaded_requeststarts loading the main menu in the background, so the switch at the end is instant instead of hanging on a black frame. - Moves on when the video ends, through the VideoStreamPlayer's
finishedsignal. - Lets players skip. Nobody wants to watch your logo on their fiftieth launch. Any key, mouse click or gamepad button skips straight to the menu.
- Only leaves once. The
_leavingguard stops a skip and thefinishedsignal from both firing a scene change.
Step 4: Make it the main scene
In Project → Project Settings → Application → Run, set Main Scene to res://intro/splash.tscn. Or right-click the scene in the FileSystem dock and pick Set as Main Scene.
Run the project. Godot boots to black, the intro plays with sound, and the menu takes over when it fades out.
A few finishing touches
- Audio bus. VideoStreamPlayer has a Bus property. If your game has separate Music and SFX volume sliders, route the intro to the right bus so it respects the player's settings.
- Fade into the menu. The intro already ends on black, so a short fade-in on the main menu makes the hand-off seamless.
- Skip on later launches. Some games only force the full intro on first launch. Save a flag in a config file and let
_ready()jump straight to the menu if it's set.
Wrapping up
The whole project is a small Remotion app: a geometry file, a timing file, a component per part of the logo, a CRT wrapper and a cue sheet for sound. The parts that made it feel good were the tweaks: holding back the glow, killing the overshoot, cutting sounds until the impact had room to land.
If you're a small studio without an intro yet, I'd recommend trying it in code. You can retime the whole thing by editing one file, and the result is fairly easy to get into Godot.
Links